Initial Setup
Enable email verification to ensure user authenticity and protect application routes.
Add required or optional email verification.
Add SuperTokens email verification to this application. Inspect the existing recipes and determine whether verification should be REQUIRED or OPTIONAL; ask if the business rule is unclear. Configure the backend and frontend EmailVerification and Session recipes consistently, add the required UI routes or custom flow, and verify protected-route behavior. Account for passwordless email behavior and keep delivery credentials in environment variables. Run the relevant tests, typechecks, and build.
Overview
Email verification needs to be explicitly configured to work in your SuperTokens integration. The functionality offers two ways to set it up:
REQUIRED: The user needs to verify before they can access any protected routes.OPTIONAL: The sessions include information about the email verification status, but it is up to you to enforce the requirement based on your business logic.
Before you start
For passwordless login, with email, a user’s email is automatically marked as verified when they login. Therefore, this flow only triggers if a user changes their email during a session.
Steps
1. Initialize the backend recipe
import SuperTokens from "supertokens-node";
import EmailVerification from "supertokens-node/recipe/emailverification";
import Session from "supertokens-node/recipe/session";

SuperTokens.init({
  appInfo: {
    apiDomain: "...",
    appName: "...",
    websiteDomain: "...",
  },
  recipeList: [
    EmailVerification.init({
      mode: "REQUIRED", // or "OPTIONAL"
    }),
    Session.init(),
  ],
});
import (
"github.com/supertokens/supertokens-golang/recipe/emailverification"
"github.com/supertokens/supertokens-golang/recipe/emailverification/evmodels"
"github.com/supertokens/supertokens-golang/recipe/session"
"github.com/supertokens/supertokens-golang/recipe/session/sessmodels"
"github.com/supertokens/supertokens-golang/supertokens"
)
func main() {
supertokens.Init(supertokens.TypeInput{
RecipeList: []supertokens.Recipe{
emailverification.Init(evmodels.TypeInput{
Mode: evmodels.ModeRequired, // or evmodels.ModeOptional
}),
session.Init(&sessmodels.TypeInput{}),
},
})
}from supertokens_python import init, InputAppInfo
from supertokens_python.recipe import session
from supertokens_python.recipe import emailverification
init(
app_info=InputAppInfo(
api_domain="...", app_name="...", website_domain="..."),
framework='...',
recipe_list=[
emailverification.init(mode='REQUIRED'), # or 'OPTIONAL'
session.init()
]
)2. Initialize the frontend recipe
You need to make changes to the auth route configuration, as well as to the supertokens-web-js SDK configuration at the root of your application:
This change is in your auth route configuration.
import SuperTokens, { SuperTokensWrapper } from "supertokens-auth-react";
import { getSuperTokensRoutesForReactRouterDom } from "supertokens-auth-react/ui";
import EmailVerification from "supertokens-auth-react/recipe/emailverification";
import { EmailVerificationPreBuiltUI } from "supertokens-auth-react/recipe/emailverification/prebuiltui";
import Session from "supertokens-auth-react/recipe/session";
import reactRouterDOM, { Routes, BrowserRouter as Router, Route } from "react-router-dom";

SuperTokens.init({
  appInfo: {
    apiDomain: "...",
    appName: "...",
    websiteDomain: "...",
  },
  recipeList: [
    EmailVerification.init({
      mode: "REQUIRED", // or "OPTIONAL"
    }),
    Session.init(),
  ],
});

function App() {
  return (
    <SuperTokensWrapper>
      <div className="App">
        <Router>
          <div className="fill">
            <Routes>
              {getSuperTokensRoutesForReactRouterDom(reactRouterDOM, [
                /* Other pre-built UI */ EmailVerificationPreBuiltUI,
              ])}
              // ... other routes
            </Routes>
          </div>
        </Router>
      </div>
    </SuperTokensWrapper>
  );
}import SuperTokens, { SuperTokensWrapper } from "supertokens-auth-react";
import { canHandleRoute, getRoutingComponent } from "supertokens-auth-react/ui";
import EmailVerification from "supertokens-auth-react/recipe/emailverification";
import { EmailVerificationPreBuiltUI } from "supertokens-auth-react/recipe/emailverification/prebuiltui";
import Session from "supertokens-auth-react/recipe/session";
SuperTokens.init({
appInfo: {
apiDomain: "...",
appName: "...",
websiteDomain: "...",
},
recipeList: [
EmailVerification.init({
mode: "REQUIRED", // or "OPTIONAL"
}),
Session.init(),
],
});
function App() {
if (canHandleRoute([/* Other pre-built UI */ EmailVerificationPreBuiltUI])) {
return getRoutingComponent([/* Other pre-built UI */ EmailVerificationPreBuiltUI]);
}
return <SuperTokensWrapper>{/*Your app*/}</SuperTokensWrapper>;
}// this goes in the auth route config of your frontend app (once the pre-built UI script has been loaded)
supertokensUIInit("supertokensui", {
appInfo: {
apiDomain: "...",
appName: "...",
websiteDomain: "...",
},
recipeList: [
supertokensUIEmailVerification.init({
mode: "REQUIRED", // or "OPTIONAL"
}),
],
});This change goes in the supertokens-web-js SDK configuration at the root of your application:
import SuperTokens from "supertokens-web-js";
import EmailVerification from "supertokens-web-js/recipe/emailverification";
import Session from "supertokens-web-js/recipe/session";

SuperTokens.init({
  appInfo: {
    apiDomain: "...",
    appName: "...",
  },
  recipeList: [EmailVerification.init(), Session.init()],
});2. Initialize the frontend recipe
import SuperTokens from "supertokens-web-js";
import EmailVerification from "supertokens-web-js/recipe/emailverification";
import Session from "supertokens-web-js/recipe/session";

SuperTokens.init({
  appInfo: {
    apiDomain: "...",
    appName: "...",
  },
  recipeList: [EmailVerification.init(), Session.init()],
});
3. Send the email verification email
After a user signs up, or when the email verification validators fail, you need to tell the user about the email verification process. Redirect them to a screen that informs them about the current status and call the verification API.
Create a new screen on your app that asks the user to enter their email to receive an email. This screen should ideally link to the sign in form. Once the user has entered their email, you can call the following API to send an email verification email to that user:
import { sendVerificationEmail } from "supertokens-web-js/recipe/emailverification";

async function sendEmail() {
  try {
    let response = await sendVerificationEmail();
    if (response.status === "EMAIL_ALREADY_VERIFIED_ERROR") {
      // This can happen if the info about email verification in the session was outdated.
      // Redirect the user to the home page
      window.location.assign("/home");
    } else {
      // email was sent successfully.
      window.alert("Please check your email and click the link in it");
    }
  } catch (err: any) {
    if (err.isSuperTokensGeneralError === true) {
      // this may be a custom error message sent from the API by you.
      window.alert(err.message);
    } else {
      window.alert("Oops! Something went wrong.");
    }
  }
}
curl --location --request POST '<YOUR_API_DOMAIN>/auth/user/email/verify/token' \
--header 'Authorization: Bearer ...'The response body from the API call has a status property in it:
status: "OK": An email was successfully sent to the user.status: "EMAIL_ALREADY_VERIFIED_ERROR": This status can return if the info about email verification in the session was outdated. Redirect the user to the home page.status: "GENERAL_ERROR": This is only possible if you have overridden the backend API to send back a custom error message which should display on the frontend.
Change the email verification link
By default, the email verification link points to the websiteDomain configured on the backend.
That would be the /auth/verify-email route if /auth is the value of websiteBasePath.
If you want to change this to something different, follow the next example:
import SuperTokens from "supertokens-node";
import EmailVerification from "supertokens-node/recipe/emailverification";

SuperTokens.init({
  supertokens: {
    connectionURI: "...",
  },
  appInfo: {
    apiDomain: "...",
    appName: "...",
    websiteDomain: "...",
  },
  recipeList: [
    EmailVerification.init({
      mode: "OPTIONAL",
      emailDelivery: {
        override: (originalImplementation) => {
          return {
            ...originalImplementation,
            sendEmail(input) {
              return originalImplementation.sendEmail({
                ...input,
                emailVerifyLink: input.emailVerifyLink.replace(
                  // This is: `<YOUR_WEBSITE_DOMAIN>/auth/verify-email`
                  "http://localhost:3000/auth/verify-email",
                  "http://localhost:3000/your/path",
                ),
              });
            },
          };
        },
      },
    }),
  ],
});
import (
"strings"
"github.com/supertokens/supertokens-golang/ingredients/emaildelivery"
"github.com/supertokens/supertokens-golang/recipe/emailverification"
"github.com/supertokens/supertokens-golang/recipe/emailverification/evmodels"
"github.com/supertokens/supertokens-golang/supertokens"
)
func main() {
supertokens.Init(supertokens.TypeInput{
RecipeList: []supertokens.Recipe{
emailverification.Init(evmodels.TypeInput{
Mode: evmodels.ModeOptional,
EmailDelivery: &emaildelivery.TypeInput{
Override: func(originalImplementation emaildelivery.EmailDeliveryInterface) emaildelivery.EmailDeliveryInterface {
ogSendEmail := *originalImplementation.SendEmail
(*originalImplementation.SendEmail) = func(input emaildelivery.EmailType, userContext supertokens.UserContext) error {
// This is: `<YOUR_WEBSITE_DOMAIN>/auth/verify-email`
input.EmailVerification.EmailVerifyLink = strings.Replace(
input.EmailVerification.EmailVerifyLink,
"http://localhost:3000/auth/verify-email",
"http://localhost:3000/your/path", 1,
)
return ogSendEmail(input, userContext)
}
return originalImplementation
},
},
}),
},
})
}from supertokens_python import init, InputAppInfo
from supertokens_python.recipe import emailverification
from supertokens_python.ingredients.emaildelivery.types import EmailDeliveryConfig
from supertokens_python.recipe.emailverification.types import EmailDeliveryOverrideInput, EmailTemplateVars
from typing import Dict, Any
def custom_email_delivery(original_implementation: EmailDeliveryOverrideInput) -> EmailDeliveryOverrideInput:
original_send_email = original_implementation.send_email
async def send_email(template_vars: EmailTemplateVars, user_context: Dict[str, Any]) -> None:
# This is: `<YOUR_WEBSITE_DOMAIN>/auth/verify-email`
template_vars.email_verify_link = template_vars.email_verify_link.replace(
"http://localhost:3000/auth/verify-email", "http://localhost:3000/your/path")
return await original_send_email(template_vars, user_context)
original_implementation.send_email = send_email
return original_implementation
init(
app_info=InputAppInfo(
api_domain="...", app_name="...", website_domain="..."),
framework='...',
recipe_list=[
emailverification.init(
mode="OPTIONAL",
email_delivery=EmailDeliveryConfig(override=custom_email_delivery))
]
)4. Verify the email after the user clicks the link
Once the user clicks the email verification link, and it opens your app, call the following function.
It extracts the token and tenantId (if you use a multi tenant setup) from the link and calls the token verification API.
When the user clicks the email verification link, and it opens as a deep link into your mobile app, you can remove the token and call the verification API.
import { verifyEmail } from "supertokens-web-js/recipe/emailverification";

async function consumeVerificationCode() {
  try {
    let response = await verifyEmail();
    if (response.status === "EMAIL_VERIFICATION_INVALID_TOKEN_ERROR") {
      // This can happen if the verification code is expired or invalid.
      // You should ask the user to retry
      window.alert("Oops! Seems like the verification link expired. Please try again");
      window.location.assign("/auth/verify-email"); // back to the email sending screen.
    } else {
      // email was verified successfully.
      window.location.assign("/home");
    }
  } catch (err: any) {
    if (err.isSuperTokensGeneralError === true) {
      // this may be a custom error message sent from the API by you.
      window.alert(err.message);
    } else {
      window.alert("Oops! Something went wrong.");
    }
  }
}curl -X POST "<YOUR_API_DOMAIN>/auth/public/user/email/verify" \
-H "Content-Type: application/json" \
-d '{
"method": "token",
"token": "ZTRiOTBjNz...jI5MTZlODkxw"
}'const response = await fetch("<YOUR_API_DOMAIN>/auth/public/user/email/verify", {
method: "POST",
headers: {
"Content-Type": "application/json"
},
body: JSON.stringify({
"method": "token",
"token": "ZTRiOTBjNz...jI5MTZlODkxw"
})
});package main
import (
"net/http"
"strings"
)
func main() {
req, err := http.NewRequest("POST", "<YOUR_API_DOMAIN>/auth/public/user/email/verify", strings.NewReader(`{
"method": "token",
"token": "ZTRiOTBjNz...jI5MTZlODkxw"
}`))
if err != nil {
panic(err)
}
req.Header.Set("Content-Type", "application/json")
response, err := http.DefaultClient.Do(req)
if err != nil {
panic(err)
}
defer response.Body.Close()
}import requests
response = requests.post(
"<YOUR_API_DOMAIN>/auth/public/user/email/verify",
headers={
"Content-Type": "application/json"
},
json={
"method": "token",
"token": "ZTRiOTBjNz...jI5MTZlODkxw"
},
)The response body from the API call has a status property in it:
status: "OK": Email verification was successful.status: "EMAIL_VERIFICATION_INVALID_TOKEN_ERROR": This can happen if the verification code expires or is invalid. You should ask the user to retry.status: "GENERAL_ERROR": This is only possible if you have overridden the backend API to send back a custom error message which should display on the frontend.
References
Verification email
This is how the email that the user receives looks like:
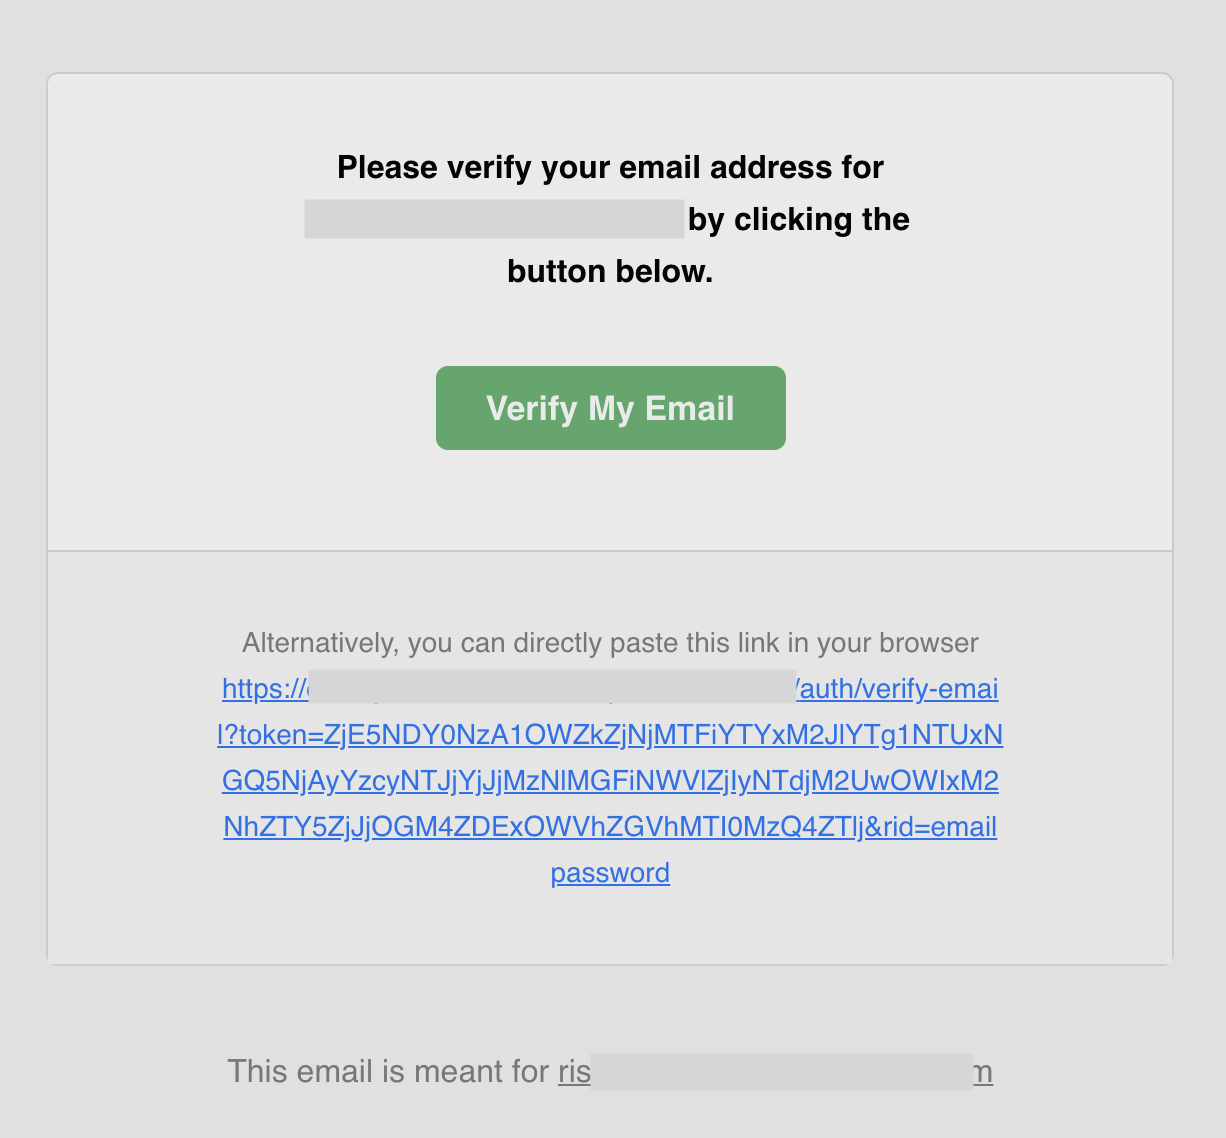
You can find the source code of this template on GitHub To understand more about how you can customize it, check the email delivery section.
Verification link lifetime
By default, the email verification link’s lifetime is 1 day. This can change via the Core configuration (time in milliseconds):
- Go to the SuperTokens SaaS dashboard and select the relevant Managed deployment.
- Open Configuration and find the Email Verification configuration card.
- Change the
email_verification_token_lifetimevalue. Configuration changes are saved automatically.
# Here we set the lifetime to 2 hours.

docker run \
    -p 3567:3567 \
    -e EMAIL_VERIFICATION_TOKEN_LIFETIME=7200000 \
    -d supertokens/supertokens-<db_name>
# You need to add the following to the config.yaml file.
# The file path can be found by running the "supertokens --help" command
email_verification_token_lifetime: 7200000